NIST working with industry, experts on volumetric, range performance testing of scanners
As 3D imaging hardware and software continue their march toward mainstream, capturing 3D data to boost ROI in building or bridge construction, mapping assets, and increasing the public’s safety with real-time navigation information, the industry’s first standards have the potential to accelerate their market acceptance, driving the next evolution of systems.
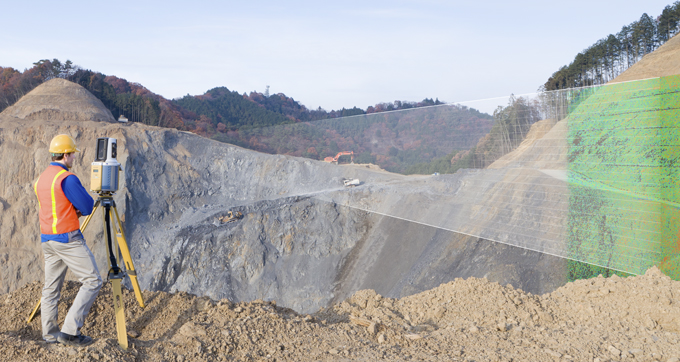
Proposed standards for range and volumetric performance of laser-based, scanning, time-of-flight, 3D imaging systems in the medium range – capable of operating within at least a portion of the range from 2 meters to 150 meters – and capable of producing a target’s point cloud, have been launched by ASTM International and the National Institute of Standards and Technology (NIST).
Dr. Kamel Saidi, chairman of the ASTM E57.02 subcommittee on test methods for 3D imaging systems for the National Institute of Standards and Technology (NIST), told this reporter standards could become reality in as little as six months

The standards are intended for scanner manufacturers to specify instrument performance against consensus-based benchmarks. Users of the devices can use the standard to compare various 3D scanners, verify device performance against manufacturers’ specs, and evaluate performance for specific applications or conditions, including:
- Construction and maintenance
- Surveying
- Industrial metrology
- Medical imaging
- Animation
- Mapping and Terrain Characterization
- Manufacturing (aerospace, shipbuilding, etc.)
- Transportation
- Mining
- Mobility
- Historic preservation
- Forensics
“[Standards] are absolutely needed,” Saidi told SPAR. For example, the federal General Services Administration (GSA) recently mandated all building projects they undertake use a BIM (building information model) model derived from laser scanning.
Problem is, whenever they get a 3D model of one of their facilities, “they have no idea how good that model is compared to reality,” Saidi said. “We did experiments with GSA to see what that reality is, and there is a significant difference between the 3D model and the reality, and from one different service provider compared to another.”
Right now, each manufacturer evaluates and markets laser scanners according to their own testing methods. For instance, range accuracy includes how much noise is captured in scan data, and that can lead to different interpretations by manufacturers.
“Our aim from the beginning is to provide users a way to compare instruments,” Saidi said. “I think, eventually, the users will drive this shift, they want to know how it works.”
ASTM International’s Committee E57 on 3D Imaging Systems was formed in 2006. About third of the members – including manufacturers, federal agencies, design professionals, trade groups, and academia – meet twice a year to discuss issues related to 3D imaging systems, which include laser scanners and photogrammetric cameras. Stakeholders include manufacturers, federal agencies, design professionals, professional societies, trade associations, and academia.
At the moment, just two laser scanner manufacturers, FARO Technologies and Basis Software, the maker of Surphaser laser scanners, are involved with E57.02’s volumetric standards’ testing to see how well the scanner performs measuring the horizontal and vertical angles of an object being scanned. The volumetric standard would establish requirements and methods for evaluating the derived point-to-point distance measurement error throughout the scanning volume of a scanner.
The standard for testing volumetric performance follows work on another standard to test the range error of 3D laser scanners to establish tests for evaluating the range measurement performance of medium-range 3D imaging systems.
Essentially, the range performance standard (ASTM WK12373 – New Practice for Evaluation of Relative Range Error for Medium-Range 3D Imaging Systems) would evaluate a laser scanners’ ability to measure relative distance between planar targets as a function of range, while requiring the acquisition of sufficient data to fit a plane.
In its description of the proposed standard, ASTM said it doesn’t want it to replace “more in-depth methods used for instrument calibration or compensation,” but definitions, environmental requirements, test procedures, and report formats are still included in the standard.
Voting for the range standard just wrapped up earlier this month, but debate remains over the definitions of “relative” and “absolute” range. Saidi said revisions and reballoting should be completed by early next year.
“Both of these standards, once they are published, would mean 3D laser scanner manufacturers would give product specifications based on these standards,” Saidi said. “So, a laser scanner might have a phrase in its specs that say something like ‘relative range performance based on ASTM standards,’ or something like that.”
ASTM said testing standards for finding errors in the range and volumetric performance will play a big role in future industry growth by providing:
- a basis for fair comparison of 3D imaging systems
- facilitating consistent and clear terminology
- increasing user confidence that systems will perform as intended
Saidi said developing a draft standard should come fairly quickly for measuring errors in both range and volumetric performance. So, how soon after can we expect the first standard?
“I’m optimistic,” he said. “I think we can produce a standard in the next six months to a year.” The next meeting of the .02 subcommittee is Thursday, Aug. 29.
Interestingly, despite the growing reliance on software to model 3D data scans, Saidi said there’s no action on instituting plans to develop standards for the 3D modeling of data, at the moment.
“It’s on the list, but, right now, it’s a lower priority,” he said, adding it was important to set standards for the performance of the laser scanner before moving upstream in the workflow.
For more info on E57, email or call Pat Picariello, ASTM director of developmental operations, at [email protected] or 610-832-9720.


