3D imaging and measurement firm bullish on 2014 prospects
3D imaging and measurement firm FARO Technologies Inc. Wednesday reported a 7 percent increase in fourth-quarter net income to $8.3 million, or $0.48 per share, on sales of $89.9 million, an 11.4 percent jump.
FARO, headquartered in Lake Mary, Fla., is a publicly traded company that designs, manufactures and markets 3D measurement and imaging systems used for inspecting components and assemblies, rapid prototyping, documenting large volume spaces or structures in 3D, surveying and construction, and for accident and crime scene investigation and reconstruction.
The company also reported fourth-quarter new order bookings were $98.6 million, up more than 20 percent.
2013 Results
For the year ended Dec. 31, FARO reported a 6.7 percent increase in revenue to $291.8 million due to an “increase in worldwide demand” for its products and services.
Net income fell by $1.5 million to $21.5 million for the year. Cash flow from operations for 2013 was $34.3 million, compared to $27.9 million in 2012. Research and development expenses increased $4.8 million, or 27.5 percent, to $22.4 million for the year.
The company’s stock closed up 2.7 percent Wednesday to $57.30, and fell about 20 cents in after-hours trading. FARO shares have a 52-week high of $60.91 and a 52-week low of $32.50. The company has market capitalization of $980.7 million and a P/E of 46.54.
“We enter 2014 with solid momentum from our growth in the second half of 2013, a portfolio of new products with high customer acceptance already in the market, a pipeline of new product launches planned for 2014, and increased resources deployed in sales and R&D to capitalize on improving market conditions and to expand and accelerate product development,” said FARO CEO Jay Freeland.
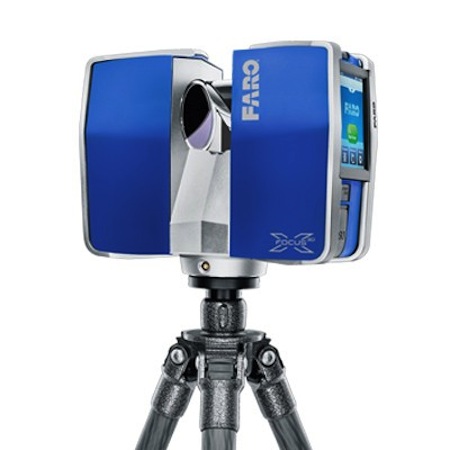
The company’s FaroArm, FARO Laser ScanArm and FARO Gage articulated measuring devices, the FARO Laser Tracker Vantage, the FARO Focus3D, and the FARO 3D Imager AMP, and their companion CAM2 software, provide for Computer-Aided Design, or CAD, based inspection and/or factory-level statistical process control and high-density surveying.
The devices integrate the measurement, quality inspection, and reverse engineering functions with CAD software to improve productivity, enhance product quality and decrease rework and scrap in the manufacturing process. The Company uses the acronym “CAM2” for this process, which stands for computer-aided measurement.


